
How to Set Standing Desk Presets: Practical Setup Guide for 2026
How to set standing desk presets accurately for optimal home office ergonomics in November 2026, including memory keypad setup and reset steps.
 By Arriana Vasquez
Updated November 6, 2026

Transitioning between sitting and standing throughout the workday should feel effortless, yet many home office workers struggle with manually adjusting their desk height multiple times each afternoon. Holding down directional arrows until you guess the right posture often leads to awkward wrist angles, neck stiffness, and uneven motor runtimes. Learning how to set standing desk presets allows you to lock in your exact ergonomic heights so you can switch postures with a single button press. Taking time to configure these memory buttons eliminates daily guesswork and helps protect your spinal alignment during long computer sessions.
Most motorized desks, from dual-motor frames to space-saving corner models, feature integrated digital keypads capable of storing several custom height positions. Whether your controller uses an explicit save button or a press-and-hold programming sequence, the initial setup requires establishing your ideal seated and standing elbow levels first. If you are configuring a workstation fresh out of the box, reviewing a practical standing desk assembly guide can help verify that your frame is level before programming. Once your physical workstation is aligned, saving your custom heights takes only a few seconds and provides consistent comfort every time you work.
| Award | Product | HOF Score About HOF ScoreThe HOF Score is our own rating from 0 to 10, based on performance, design and build, ease of use, and value. It reflects independent research and is never influenced by manufacturers, retailers, or affiliate commissions. Learn more › | |
|---|---|---|---|
| Best Overall |
 HUANUO Electric Standing Desk |
9.2/10 | Buy |
| Best Value |
 Huuger Dual Motor Electric Standing Desk Frame |
9.2/10 | Buy |
| Best Budget |
 VIVO Black 32 in Standing Desk Converter |
8.1/10 | Buy |
| Best Premium |
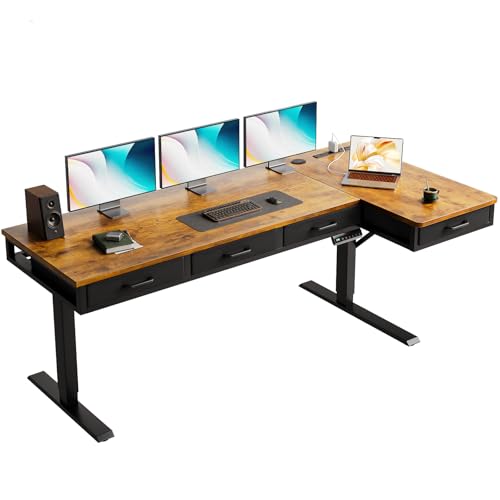 OffiGo 63 Inch L Shaped Electric Standing Desk |
8.1/10 | Buy |
 FLEXISPOT EN1 One-Piece Standing Desk |
8.0/10 | Buy | |
 OffiGo 55 Inch L Shaped Standing Desk with 4 |
8.0/10 | Buy |
Mastering Electric Standing Desk Presets and Memory Controllers
Motorized standing desks rely on digital handsets connected to an internal control box to manage elevation travel. Understanding how to set standing desk presets transforms an electric desk from an intimidating piece of office machinery into a seamless daily productivity tool. When configured properly, memory buttons allow you to switch working postures instantly without interrupting your concentration or disrupting phone calls. Establishing reliable height presets also ensures that your desk returns to the exact ergonomic elevation every single time you change positions.
Understanding How Digital Handset Memory Systems Operate
Electric desk handsets act as the primary interface between the user and the motorized lifting columns. Inside the under-desk control box, an electronic processor tracks column position using Hall-effect sensor pulses generated by the spinning internal motors. When you program a memory preset, the control module records the precise pulse count associated with that exact physical height. This stored data remains saved in non-volatile memory even if the power cable is temporarily disconnected from the wall outlet.
Most consumer motorized desks utilize either a three-preset or four-preset configuration on their front control panel. Desks with digital displays typically show real-time numerical readings indicating the current height from the floor to the top surface. Handsets generally operate in one of two modes: one-touch automatic movement or continuous-press safety mode. In one-touch mode, a quick tap sends the surface directly to the programmed height, whereas continuous-touch requires holding the button until travel stops.
Step-by-Step Programming for Keypads with Dedicated Save Buttons
Many popular dual-motor frames, such as the Huuger Dual Motor Electric Standing Desk Frame, feature an explicit save button labeled with an “S” or “M” on the handset. To program one of these controllers, start by pressing the manual up or down directional arrows until the desktop reaches your desired height. Once the surface stops at your target elevation, press the “S” button once to activate programming mode. The LED screen will typically blink or display a prompt indicating that the controller is waiting for your slot selection.
While the display is flashing, press the numeric button where you want to store the position, such as button 1 for sitting or button 2 for standing. The control box will emit a short beep or the digital display will stabilize to confirm that the new height is saved. Repeat this sequence by moving the desk to your alternate working position and assigning it to the next available number. Once saved, pressing that number briefly will prompt the motorized legs to glide smoothly to the recorded elevation.
Programming Keypads with Press-and-Hold Memory Interfaces
Some modern standing desks, including models like the FLEXISPOT EN1 One-Piece Standing Desk and the HUANUO Electric Standing Desk, feature streamlined multi-button controllers that omit a separate programming key. On these interfaces, height programming is achieved by pressing and holding the designated preset button directly. Use the directional arrows to elevate or lower the desk surface to your preferred ergonomic height. Once the desk is stationary, press and hold the desired number button for roughly three to five seconds.
The LED display will usually flash, show a brief confirmation code, or sound an audible chime to indicate that the current height has overwritten that specific memory slot. If your desk features custom icon buttons, such as a sitting chair icon and a standing figure icon, the programming routine remains virtually identical. Holding the matching icon button locks in your customized height without requiring complex button combinations. Testing the button with a quick tap immediately after programming confirms that the handset accepted the command.
Calculating Your True Seated and Standing Ergonomic Heights
Programming memory buttons is only helpful if the saved elevations actually support neutral physical posture. For seated work, your elbows should rest at an approximate 90-degree angle with your forearms parallel to the floor and your shoulders completely relaxed. Your feet should sit flat on the floor or on an ergonomic footrest without placing pressure under your thighs. Reviewing a detailed ergonomic sit-stand workstation guide can help you evaluate how proper posture reduces lower back tension and neck strain during sedentary work hours.
When determining your standing height preset, step up to the desk while wearing the shoes you normally wear during work hours. Keep your shoulders loose, bend your elbows at roughly 90 degrees, and raise the desktop until the keyboard surface meets the bottom of your resting forearms. If you frequently use an anti-fatigue mat or a balance board, make sure to stand on it while measuring your standing height preset. Failing to account for mat thickness or shoe soles can force you to shrug your shoulders, creating persistent neck fatigue.
Your computer monitor height should also be verified after setting your primary desktop positions. The top third of your display screen should align with your direct horizontal eye line when looking straight ahead. If you use a single or dual-monitor arm clamped to your desk, you may need to adjust the arm articulation slightly once the desk is elevated. Ensuring that your wrists remain straight while typing prevents repetitive strain injuries, allowing the standing desk presets to deliver genuine biomechanical relief.
Overwriting, Updating, and Clearing Stored Memory Positions
Workstation setups evolve over time as you swap office chairs, add keyboard trays, or change footwear. When your ergonomic requirements change, updating your stored presets does not require performing a full system reset. You can simply maneuver the desk to your newly measured height using the standard directional buttons. Once the desk is positioned at the correct elevation, repeat the standard programming sequence for that specific preset number to overwrite the previous entry.
The control box automatically replaces the old coordinate value with the new sensor count as soon as the confirmation signal triggers. If multiple people share a single workstation, allocating specific memory numbers to each user keeps the desk functional for everyone. For example, preset 1 and preset 2 can represent seated and standing heights for the primary user, while preset 3 and preset 4 accommodate a partner or family member. This shared arrangement prevents frequent manual adjustments and preserves personalized ergonomic settings.
Executing Control Box Initialization and Manual Reset Sequences
Occasionally, a sudden power surge, an unplugged motor cable, or an accidental collision can cause the control box to lose calibration. When this occurs, the digital handset may become unresponsive to preset button presses and display diagnostic prompts such as “rST”, “ASR”, or “E01”. Resolving this issue requires performing a manual lower-limit initialization to re-synchronize the lifting columns. Clear all physical obstructions from underneath the desk frame before initiating this reset sequence.
To perform the reset, press and hold the down arrow button continuously until the desk lowers to its absolute mechanical minimum height. Continue holding the button down for an additional five to ten seconds until the desk rebounds slightly upward or produces a clear beep. The LED display will typically show the lowest numerical height reading once calibration succeeds. After the reset completes, test each memory button to verify whether your previously saved presets survived the control box recalibration.
Pre-Travel Safety and Dynamic Cable Clearance Checks
Before relying on one-touch memory buttons for automated height adjustments, inspecting your workstation cabling is essential. Display cables, power strips, and peripheral wires must have adequate slack to extend freely when the desk travels from its lowest sitting position to its maximum standing limit. Many modern desks, like the OffiGo 63 Inch L Shaped Electric Standing Desk, feature built-in power outlets and cable management channels that simplify wire routing. Securing your wires prevents tension from pulling expensive monitors off the desktop or tearing wall outlets during automatic elevation.
You must also verify that your anti-collision detection system functions correctly before trusting automatic presets. Anti-collision sensors detect sudden resistance or motor current spikes if the desk strikes a windowsill, filing cabinet, or under-desk chair arm. Ensure that there are no low-hanging shelves, open desk drawers, or nearby obstacles within the vertical travel envelope of the desk frame. Testing the perimeter clearance once ensures that your one-touch memory buttons operate smoothly without damaging your equipment or the lifting mechanism.
Troubleshooting Motor Desynchronization and Unlevel Desktop Travel
When dual-motor desks lift uneven loads, one lifting column may occasionally travel slightly faster or slower than the other leg. This minor discrepancy can cause the desktop surface to tilt, placing excess mechanical friction on internal leg glides. If you notice a visible tilt or hear unusual motor straining during preset transit, stop the desk immediately. Using a standard bubble level across both the front and rear edges of the desktop helps determine the extent of the unlevel travel.
Unplugging the power supply for thirty seconds and re-seating the motor communication cables on the control box often resolves minor signal glitches. Following the power cycle, executing a complete downward reset sequence forces both internal motors to find their mechanical zero baseline together. Distributing heavy computer towers, multi-monitor arrays, or studio speakers more evenly across the lifting crossbeam also prevents future desynchronization. Regular inspection of the frame hardware guarantees that both motorized columns lift smoothly during automated preset transitions.
Child Lock Features and Accidental Touch Prevention
Modern standing desk handsets frequently incorporate digital lockout functions designed to prevent accidental motor activation. If you share your workspace with curious children or active pets, an inadvertent bump against a memory button could trigger sudden desk movement. When the lockout mode is engaged, the handset typically displays “LOC” or shuts off the LED screen, ignoring all single-touch preset inputs. Activating this safeguard prevents unexpected motorized travel while you are away from your workstation.
Locking and unlocking the handset usually involves pressing and holding a specific key combination for five seconds, such as the up and down arrows simultaneously or the save button. Consult your specific manufacturer manual if your keypad displays an unfamiliar lockout code that does not clear with a standard button press. Deactivating the lock restores normal one-touch memory preset functionality immediately. Utilizing this feature provides peace of mind while protecting your desk equipment from accidental collisions.
Comparing Keypad Capabilities Across Different Desk Frame Styles
Different sit-stand solutions incorporate distinct controller hardware depending on their structural format and motor mechanics. Dual-motor desks generally offer smoother height transitions and higher dynamic lift capacities compared to single-motor frames that drive both legs via a shared hex rod. When comparing budget-friendly motorized standing desks, look closely at whether the digital handset includes integrated memory buttons or merely simple up-down switches. Desks equipped with memory keypads save substantial time compared to basic models that demand continuous manual alignment.
L-shaped standing workstations, like the multi-drawer OffiGo models, often integrate specialized control modules with higher weight ratings to handle broader corner layouts. Conversely, manual desktop risers, such as the VIVO Black 32 in Standing Desk Converter, rely on pneumatic gas-spring levers rather than electronic memory buttons. With manual converters, presets do not exist in digital form; instead, users rely on mechanical locking notches across the vertical stroke. If you prefer automated, precise height recall, an electric motorized frame with programmable digital presets remains the superior choice for home office ergonomics.
Practical Takeaways for Long-Term Sit-Stand Consistency
Setting your standing desk presets correctly is the single most effective step toward building a sustainable sit-stand daily habit. When changing your working height requires nothing more than pressing a single button, you are far more likely to alternate positions throughout the afternoon. Ergonomic experts frequently recommend adopting a balanced transition cadence, such as standing for fifteen to twenty minutes out of every hour. By programming accurate sitting and standing heights, your motorized workstation handles the mechanical precision while you remain focused on your daily work.
Take the time to evaluate your posture every few weeks and adjust your saved presets whenever you update your workstation gear or seating. Even minor changes in footwear thickness or keyboard positioning can warrant a slight tweak to your stored coordinates. Keeping your digital handset properly calibrated ensures reliable motor synchronization, prevents unnecessary gear strain, and safeguards your long-term physical comfort. An organized, well-programmed standing desk turns everyday work hours into an active, healthy, and energizing experience.
About the author
Arriana Vasquez is a product writer specializing in work-from-home equipment and practical workspace solutions. Her reporting covers office chairs, standing desks, and technology designed for modern home offices. Through product research, testing, and detailed buying guides, she explores the features that influence everyday usability, comfort, and functionality. Her work helps readers compare workspace equipment and identify products suited to different working environments.